Achieving smooth, hair-free skin doesn't have to mean constant trips to the salon or investing in expensive waxing kits. Imagine the satisfaction and savings of creating effective DIY wax strips right at home, using materials you already have on hand. From repurposing the glossy pages of old magazines to crafting reusable cloth strips, this guide explores creative and cost-effective alternatives to store-bought wax strips. Whether you're looking to save money, control the ingredients that touch your skin, or simply enjoy the privacy of at-home treatments, discover how you can master the art of DIY waxing with ease and confidence.

Effective Alternatives to Store-Bought Wax Strips
Choosing the Right DIY Material
When it comes to selecting the appropriate material for DIY wax strips, it’s important to consider factors like adhesive strength, skin safety, and ease of use. Various household materials can substitute for conventional wax strips. Choosing the right material will ensure that you achieve optimal results without causing unnecessary pain or skin irritation. The most commonly used materials include old magazine covers, parchment paper, cloth, duct tape, and occasionally paper towels. Among these, glossy magazine covers, and thick cloth strips are usually the most effective options.
Cost-Effective Solutions for Hair Removal
Creating your own wax strips can significantly reduce the costs associated with professional salon visits and store-bought waxing kits. Items that are commonly found around the house, like old magazines and unused cotton cloths, can be repurposed into effective waxing tools without any additional expense. This DIY approach not only economizes money but also aligns with sustainable living practices by promoting the reuse of materials that might otherwise be discarded.
How to Use Old Magazine Covers for DIY Wax Strips
Preparation and Application Tips
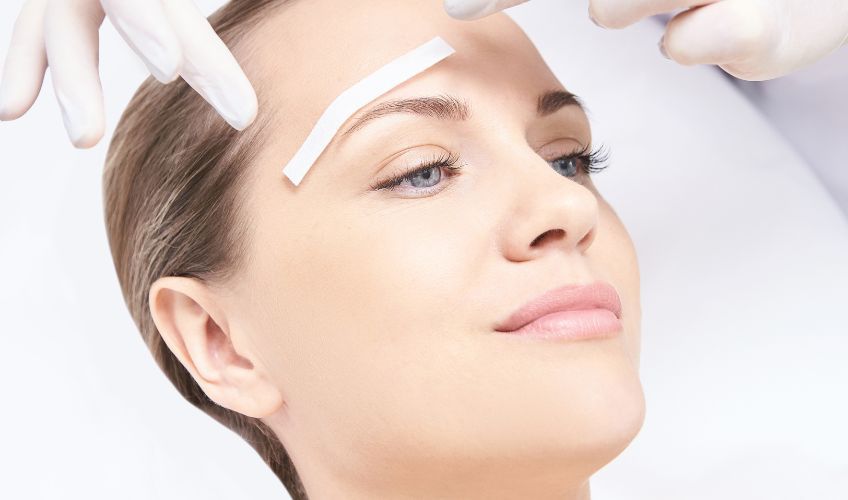
To prepare old magazine covers for use as wax strips, look for pages with a glossy finish, as these are less likely to absorb the wax. Cut the pages into strips approximately the same size as commercial wax strips. To apply, spread warm wax onto the skin in the direction of hair growth. Press the magazine strip on top of the wax and smooth it out to ensure even adherence. Pull the strip quickly in the opposite direction of hair growth to remove the hair. This method works especially well because the glossy paper doesn’t absorb wax, allowing it to adhere to the hair much like traditional strips.
Benefits and Drawbacks
The primary benefit of using old magazine covers is their availability and low cost. They are a quick and convenient alternative when you run out of regular wax strips. However, a potential drawback is the mess they can create, as they may not provide the cleanest hair removal experience. Additionally, the paper may tear or crumple if too much pressure is applied, making it less reliable than store-bought strips.
Why Parchment Paper May Not Be Suitable for Wax Strips
Issues with Thinness and Durability
Parchment paper, while a common household item, is often too thin and fragile to serve as an effective wax strip. When the wax-coated paper is applied to the skin and pulled off, it tends to tear, causing an incomplete hair removal and requiring multiple attempts. This not only prolongs the waxing process but can also increase skin irritation due to repeated applications and removals. The paper's lack of durability makes it a less than ideal choice for most DIY waxing needs.
Alternatives to Consider
Instead of parchment paper, consider using materials that are thicker and more durable. Glossy magazine covers and sturdy cloth strips are better alternatives. These materials are robust enough to handle the pulling needed for effective hair removal without tearing. Additionally, consider using kitchen wax paper, which is designed to withstand heat and stickiness and might hold up better than parchment paper.
Creating Reusable Cloth Strips for Waxing
Materials Needed
To create reusable cloth strips, you'll need a clean cotton cloth, such as an old t-shirt or a cotton sheet. Ensure the cloth is thoroughly washed and dried to avoid any contamination. Sharp scissors are also required to cut the cloth into appropriate sizes, typically the same size as commercial waxing strips, about 2 inches wide and 7 inches long, although you can adjust the size according to your needs.
Steps for Making Cloth Strips
Begin by cutting the cotton cloth into strips of the desired size. Make sure the edges are smooth to prevent fraying. After cutting the strips, you can use them just like traditional wax strips. Apply the warm wax to your skin in the direction of hair growth, press the cloth strip firmly onto the wax, and then pull it off swiftly in the opposite direction. After use, wash the cloth strips in warm soapy water, let them air dry, and store them for future waxing sessions.
Advantages of Using Cloth
Reusable cloth strips offer several benefits. They are eco-friendly and reduce waste, as they can be washed and reused multiple times. Cloth strips also tend to adhere better to wax and hair, providing a more efficient hair removal process. Additionally, cotton cloth is gentle on the skin, reducing the risk of irritation. Overall, cloth strips provide a sustainable and effective alternative to disposable wax strips.
Potential Risks of Using Duct Tape for Waxing
Pain and Skin Damage
Duct tape is renowned for its strong adhesive qualities, which makes it tempting as an emergency substitute for wax strips. However, using duct tape for waxing can result in significant pain and potential skin damage. The adhesive is much stronger than what is used in professional waxing strips and, when removed, it can pull off not just hair, but also skin cells, leading to irritation or even abrasions. The discomfort experienced during removal is usually much greater than with traditional waxing materials.
When to Avoid Using Duct Tape
It is advisable to avoid using duct tape for waxing unless there is no other alternative. It is not suitable for sensitive skin areas or for individuals with a low pain threshold. Additionally, avoid using duct tape if you have a skin condition such as eczema or psoriasis, as it can exacerbate these conditions. Instead, consider safer alternatives like glossy magazine covers or properly prepared cloth strips.
Disadvantages of Using Paper Towels as Wax Strips
Reasons Why Paper Towels Are Ineffective
Paper towels are generally too thin and fragile to be used as effective wax strips. They are designed to absorb liquids, which means they will quickly soak up the wax, making it difficult for them to adhere to the hairs properly. When attempting to pull off the waxed paper towel strips, they tend to tear easily, often failing to remove the hair and leaving behind a sticky residue on the skin.
Cleanup Challenges
The use of paper towels can lead to a messy and inefficient waxing session. The absorbed wax can make the paper towel crumble and leave bits of paper on the skin, which can be difficult to remove. This not only prolongs the cleanup process but can also result in patchy hair removal, requiring repeated waxing attempts and increasing the likelihood of skin irritation.
Guidelines for Reusing Wax Strips Safely
How Many Times to Reuse
Wax strips can generally be reused within a single waxing session as long as they continue to effectively adhere to the hair and remove it when pulled off. Most commercial wax strip instructions suggest using each strip twice in the same session. Beyond two uses, the adhesive properties typically diminish, making them less effective. Reusing beyond this limit can lead to ineffective hair removal and increased risk of skin irritation.
Minimizing Infection Risks
To minimize the risk of bacterial and fungal infections, ensure the waxing area and tools are clean and sanitized before starting. Avoid placing used strips on unclean surfaces. After waxing, cleanse the skin thoroughly and apply an antiseptic or soothing lotion to reduce the risk of infection. If you notice any signs of infection, such as redness, swelling, or pus, consult a healthcare professional for appropriate treatment.
Advantages of Waxing at Home
Financial Benefits
Waxing at home can save a substantial amount of money compared to regular salon visits. Salon waxing sessions can cost around $100, depending on the area being waxed. In contrast, DIY waxing only requires a minimal investment in supplies, most of which can be found at home or purchased at a low cost. This makes it an economically viable option for regular hair removal.
Control Over Ingredients
When waxing at home, you have complete control over the ingredients used in the wax. This allows you to avoid potentially harmful chemicals found in some commercial waxes. By making your own wax using natural ingredients like sugar, you can ensure that the waxing process is gentle on your skin and free of allergens or irritants. This is especially beneficial for individuals with sensitive skin or those prone to allergic reactions.
Maintaining Privacy
Waxing at home provides a level of privacy that is often lacking in salon settings. Many people find it uncomfortable to have their body hair removed by a stranger, especially in intimate areas. By handling waxing in the privacy of your own home, you can create a more comfortable environment and have complete control over the process. This makes the experience less intimidating and more convenient.
Steps to Prepare DIY Wax Strips
Using Household Items
Many household items can be repurposed to create effective DIY wax strips. Old magazine covers with a glossy finish, thick cloth strips, and even sturdy kitchen wax paper can be used. Ensure that these items are clean and properly cut to the required size. Typically, wax strips should be about 2 inches wide and 7 inches long, but you can adjust the size based on the area being waxed.
Ensuring Cleanliness and Hygiene
Cleanliness is paramount when preparing and using DIY wax strips. Make sure that all materials used are clean and free from dust and dirt. Wash cloth strips thoroughly before their first use and after every waxing session. For other materials like magazine covers or wax paper, ensure they are stored in a clean, dry place to avoid contamination. Maintaining hygiene will help prevent infections and ensure a smooth waxing experience.
Benefits of Homemade Wax Ingredients
Reducing Chemical Exposure
Homemade wax allows you to avoid the chemicals often found in commercial waxing products. Many of these products can contain synthetic fragrances, preservatives, and other additives that can cause skin irritation or allergic reactions. By making your own wax with simple ingredients like sugar, lemon juice, and water, you can create a natural and gentle formula that is safer for your skin.
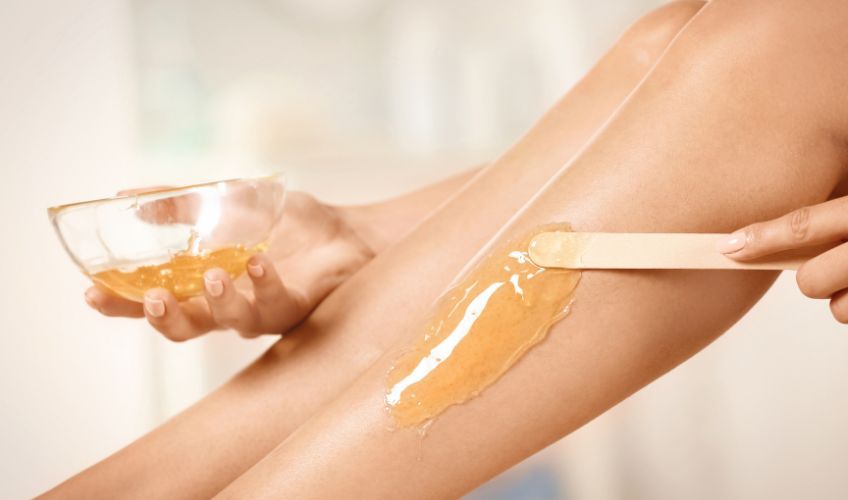
Using Kitchen Staples for Wax
The ingredients for homemade wax are often already available in your kitchen. A simple sugar wax can be made by heating sugar, water, and lemon juice until it forms a caramel-like consistency. This natural wax is not only cost-effective but also easy to prepare. It provides an efficient way to remove hair without the need for expensive and potentially harmful commercial products.
Ensuring Privacy While Waxing at Home
Creating a Comfortable Environment
To ensure a comfortable waxing experience at home, designate a clean and private space for the process. This could be your bathroom or a bedroom with good lighting. Have all your supplies within reach, including your DIY wax strips, homemade wax, and post-waxing care products like soothing lotion or aloe vera gel. Creating a comfortable environment will help you feel more at ease and make the process more efficient.
Handling Intimate Areas
Waxing intimate areas can be particularly sensitive and requires extra care. Ensure that the wax is at the right temperature to avoid burns, and test it on a small patch of skin first. Use smaller strips to have better control and precision. Take your time and work in small sections. Having the privacy and control of waxing at home allows you to be more comfortable and thorough, ensuring a better result.
Embrace the Art of DIY Waxing
By mastering the techniques of DIY waxing and utilizing simple household materials, you can achieve salon-quality results in the comfort of your own home. The savings, the control over ingredients, and the privacy make it a compelling alternative to traditional methods. So why not give it a try? Take this opportunity to transform your personal care routine, turn waxing into a creative endeavor, and enjoy smooth, hair-free skin without breaking the bank. Remember, with a little ingenuity and effort, you can turn everyday items into effective self-care tools and create a routine that fits perfectly into your lifestyle.